DesignMerge PDF Driver
This manual describes the use of the PDF Driver component of the DesignMerge® Pro software. The PDF Driver produces output in a PDF format that is compatible with PDF-enabled digital print controllers and also with PDF viewing and editing applications. Additionally, the PDF Driver may be used to produce output in a PDF/VT Caching format that is compatible with PDF/VT-enabled digital print controllers and applications, such as the Adobe PDF Print Engine (APPE).
Topics Covered in this Manual:
- Overview
- Using the PDF Driver
- Setting PDF Driver preferences
- Applying custom job names (file names) to the output
OVERVIEW
About the PDF Driver
The PDF Driver allows you to produce merged output in a PDF format that is compatible with PDF-enabled digital print controllers as well as applications that allow you to view and edit PDFs.
Additionally, the PDF Driver allows you to produce output in a PDF/VT Caching format that is compatible with PDF/VT-enabled digital print controllers and applications, such as the Adobe PDF Print Engine (APPE). The PDF/VT Caching format is optimized for Variable Data Printing. This enhances the performance of the merge session. Also, this enhances the performance of PDF/VT-enabled print controllers which store PDF/VT cached content in a preprocessed ("RIP'ed") format in memory for reuse while printing the job.
The PDF Driver allows you to review and select Adobe InDesign PDF options for the output and also provides helpful features, such as specifying a maximum number of Page Sets per Job, optimizing the merge session when merging a large number of records, and selecting a Post-Processing Destination.
Requirements for the PDF Driver
The workstation where the PDF Driver will be running must have enough disk space available to store the output files that a merge session will produce. Also, you must have a printing system that supports the PDF or PDF/VT format.
USING THE PDF DRIVER
This manual assumes that you are already familiar with the basic operation of the DesignMerge software and that you have completed Tutorial #1, which is available in DesignMerge Documentation. If you are not familiar with DesignMerge, read this introductory tutorial first before continuing with this manual.
For best performance, place the document that you will be merging and all of its required files (data file, document files, graphic files, text files) on the workstation where DesignMerge is running. For optimal performance, we do not recommend merging files from a File Server volume because this will increase the amount of time required to import these while merging the document. Please note this is a recommendation for optimal performance and not a requirement. All of the DesignMerge Print Drivers can import files from a File Server volume.
Also, when opening a document, replace any missing fonts, and update any modified/missing pictures (the pictures are in the same folder as the sample document). Additionally, if you want to print any item that is off of the live area of the page (i.e., it is on the pasteboard area), then be sure that one edge of the item is touching the page.
Start a PDF Merge Session
To use the PDF Driver, follow the steps outlined below:
- Open a document.
Open a document that has been prepared by DesignMerge for variable data. For this example, open the sample Form Letter document (Form Letter.indd) that is in the 1) Form Letter Tutorial folder in DesignMerge Documentation. Confirm the document has the DesignMerge variables that you added when you followed the steps in Tutorial #1, which is available in DesignMerge Documentation. - Select Merge from the DesignMerge menu.
This opens the DesignMerge window. - Choose the range of records you wish to process.
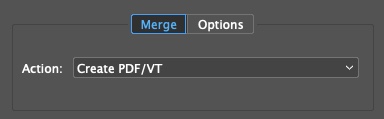
For this example, select All, check Skip Header Row, and Step by 1. - For the Merge Action, select Create PDF/VT.
- Select appropriate Options for this merge session.
To access options for a merge session, click the Options button. You can then select the options that would be appropriate for this merge session. For this example, select Off for CopyFit, and select Standard Mode for Rules. - Click the Start button, and select a data file if prompted to do so.
The sample data file for the Form Letter Tutorial document is named Form-Letter-Data.txt and is located in a folder inside the 1) Form Letter Tutorial folder. - Select PDF Driver options for the merge session.
Before starting the merge session, DesignMerge opens the PDF Driver window which allows you to select additional options that pertain to a PDF Driver merge session, as described in the next set of steps.
Select PDF Driver Options
The PDF Driver window, shown below, lets you select options that are specific to a PDF Driver merge session. If the window is not fully extended, you may click the "disclosure triangle", which is shown circled in the picture below:
Each option on the PDF Driver window is described below:
Base Job Name
The Base Job Name serves as the base of the file names that will be given to the files the merge session creates. By default, the Base Job Name is the name of the current layout/document. However, certain characters will be automatically converted to an underscore (_) or a hyphen (-) to ensure the name will be compatible with any system. Additionally, to provide a unique name for each file that the merge session creates, the Print Driver will automatically add a separator character, the record range whose pages the file contains, and then the appropriate file name extension. Note there are several preferences related to naming output. For more details about these, see the "Preferences" topic later in this manual.
Page Sets per Job
A Pro edition of DesignMerge allows you to control the number of print jobs (in this case, PDF files) that will be created by this merge session. Selecting All will create one job (one file) that contains all of the merged pages. You may prefer to indicate a maximum number of merged page sets (variations of the document) to place in a single job (output file), which allows you to produce jobs (output files) of a more manageable size when merging large data files.
All
Select All (the default setting) to automatically include all of the merged pages in a single job. For example, if you are merging 427 records one-by-one into a two-page document and select All for Page Sets per Job, the merge session will produce one job that contains all 427 merged page sets (954 merged pages, the 427 variations of the two-page document). The job's name will indicate the record range it contains, for example: "Form_Letter_1-427.pdf".
Single PDF Files (a Pro feature)
Select Single PDF Files to quickly produce individual, personalized PDF files. Each merged variation of the document will be saved as an individual PDF. The file naming for each PDF is controlled using the Control Frame feature, allowing each PDF file to be uniquely named using variable data or by applying a DesignMerge rule. This new mode is distinct from the previous method of producing personalized PDF files in that it is more than 10 times faster. If you are using an older version of the DesignMerge software, then you may instead use the original method (described next), which produces the same output but at a much slower output speed. For more information about using the Control Frame feature, see How to create individual, personalized PDF files with unique names.
Specify (a Pro feature)
The Specify option allows you to control the number, and therefore size, of the jobs that the merge session will create. This option also lets you start processing merged pages on your printing device while the merge session continues producing remaining pages. For a multiple-up document (a document that is set up to merge multiple records onto a page), use this option to automate running multiple Step-by-Number or Stack Range merge sessions on consecutive ranges of records.
Select Specify to automatically separate the output into several jobs for the printer, which can result in greater overall throughput. We call this "chunking". When the merge session finishes producing the first "chunk", the merge session can send the job to the printer so the printing device can get started (rather than waiting for the session to finish producing all of the pages). Then the session automatically continues merging to produce the next chunk of output and then sends that job to the printer. This process continues until all of the records have been processed.
After you select Specify, then enter your desired number of page sets per job. Note that the window will also display in parentheses the number of merged pages that will be contained by the number of page sets you have specified. If you enter the number "1", then the merge session will produce a job for each new page set. If you enter a number that is greater than the total number of page sets to be processed, then all of the merged pages will be printed in a single job.
For example, using the above example of merging 427 records one-by-one into a document, if you select Specify and enter "100" for Page Sets per Job, then the merge session will create five jobs, four containing 100 merged page sets each, and one containing the final 27 merged page sets. Each job's name will indicate the record range it contains based on which record is in the first-up on each merged page set, for example: "Form_Letter_1-100.pdf", "Form_Letter_101-200.pdf", "Form_Letter_201-300.pdf", "Form_Letter_301-400.pdf", and "Form_Letter_401-427.pdf".
Subset (a Pro feature)
The Subset option is available when you are using a Cut & Stack or a Stack Subset mode for the merge session (described in Tutorial #3, which is available in DesignMerge Documentation). Selecting Subset allows you to control the number and size of the jobs that the merge session will create by automating running multiple Stack Subset merge sessions on consecutive ranges of records. This lets you cut & stack each printed job independently of the other jobs the merge session creates. Also, this option lets you start processing merged pages on your printing device while the merge session continues producing remaining pages.
Select Subset to automatically separate the output into several jobs that contain subsets of the records selected for the merge session. The subset of records for each job will be merged in a Cut & Stack sequence.
After you select Subset, then enter your desired number of page sets per job. When merging, the merge session will separate the records into subsets that contain the number of records required to merge each job and will merge the subset of records for each job in a Cut & Stack manner.
For example, when merging all 8 records of an 8-record data file into a 2-up document in a Cut & Stack mode, if you select Subset and enter "2" for Page Sets per Job, the merge session will merge the first four records (record #1 through record #4) in a Cut & Stack sequence into the first job and then will merge the last four records (record #5 through record #8) in a Cut & Stack sequence into the second job. Each job's name will indicate the record range it contains based on which record is in the first-up on each merged page set, for example: "ID_Badges_1-2.pdf" and "ID_Badges_5-6.pdf".
Presets
Use this popup menu to select a Preset configuration of options that are compatible with your printing device. The Standard Preset is provided for generic output and works for most digital printers and PDF applications.
The Presets option is available on all of the panes on the PDF Driver window. Selecting a Preset automatically selects options on ALL of the panes on the window. You may then change the pre-selected options before continuing (any options that are not applicable to the selected Preset will be dimmed). Please note making selections that are incompatible with your printing device could result in printing errors. To return all options to the original default settings for the current Preset, simply re-select the Preset.
You cannot save changes to the default Presets, however, the PDF Driver window retains your latest selections as its current defaults until you either select a different Preset or reselect the same Preset. Each time you select a Preset, all options are reset to the original default settings for that Preset.
Additionally, you can save your own Presets. To create a custom Preset, select Save As from the Preset popup menu, enter a Name for the Preset, and click OK. You can still change the options for a custom Preset before continuing, and you can save the changes by selecting Save from the Preset popup menu. You can also rename, duplicate, and delete custom Presets selecting one of these actions from the Preset popup menu.
Format
Use this popup menu to select your preferred PDF format for this VDP job. Note the PDF/VT without metadata and PDF/VT formats allow for fastest possible performance and smallest output file size. Each format is described below:
Select PDF/VT without metadata to produce output in a PDF/VT Caching format.
Select PDF/VT to produce output in a PDF/VT Caching format that includes Document Part Metadata (DPM). For some systems, DPM is required for the press to recognize the file as being in a PDF/VT format. However, including DPM may result in a slight performance degradation, so we recommend using this option only if it is required by your digital press.
Select Standard PDF if your digital press does not support a PDF/VT formatted file.
Performance
These options enable features to optimize the merge session.
VDP Optimizer (a Pro feature)
This option enables the exclusive VDP Optimizer feature, which is a separate plug-in component for DesignMerge. The VDP Optimizer ensures the fastest possible performance for large variable data jobs. This option will work for any DesignMerge job, but is most helpful when producing a large volume of output for hundreds of records. Select Document Pages Only (the default setting) to enable optimizing all pages in the document. If your document is using a Page Rule that applies Parent Pages, then you may prefer to select Document & Parent Pages.
For more information about Rules, including an example of a job that uses a Page Rule to apply Parent Pages, see Tutorial #1, which is available in DesignMerge Documentation.
Destination
This section specifies what to do with each job after it has been produced. Select an Action to tell the merge session where to send each job as soon as it has been saved in the folder that you will select when you click the Continue button. Each option is described below:
Leave in Folder
This is the default option. The jobs will be placed in the destination folder that you select when you click the Continue button. You can then submit the jobs to whichever printer you prefer at any time by using a submission tool for that printing device or by placing the jobs in a Hot Folder if your digital printing system provides support for Hot Folders. Or, you may select a Hot Folder as the destination folder, noting that this means you may not end up with a copy of the output on your own system.
Copy to Specified Folder
This option instructs the merge session to copy each job to a second folder. Use the Select Folder button to specify the folder. You may select any folder, including a "Hot Folder" if your printing device provides Hot Folder support. Selecting a Hot Folder can be useful, as described above. Selecting the Copy to Specified Folder option allows you to save the original output in the folder you will select when you click the Continue button while automatically sending a copy of the output to the location you selected for this option.
It can be useful to send output, or a copy of the output, to a Hot Folder. A Hot Folder can automatically send each job to your printer for processing as soon as each job has been produced and also can optionally assign specific printer settings to those jobs. Additionally, a Hot Folder can normally send a job to a printer significantly faster than a print queue on your system can.
Send to Specified Printer
This option instructs the merge session to send a copy of the jobs to the specified printer. Like the Hot Folder approach, this approach ensures parallel processing by allowing the printing device to begin processing pages while the merge session continues producing output.
When the Download to Printer option is selected, the Printer popup menu will become active. The Printer menu will list all of the printers available to you on your system. Choose the printer that you wish to receive the jobs. You will probably prefer to choose a printer that has been set up to send jobs to the Hold queue on your printing device, which will allow your printer operator to apply appropriate printer properties to a job before printing it. As soon as each job has been produced, it will be downloaded to the selected printer.
Selecting the Download to Printer option allows you to save the original output in the folder you will select when you click the Continue button while automatically sending a copy of the output to the printer that you selected for this option.
Create Zip File Container
When this option is checked, each job will be saved in a Zip File Container format. The Print Driver will create a Zip File Container for each job that is created by the merge session. Note that some PDF consumers do not support Zip File Containers.
Important Information for Those Using a Macintosh OS X System
To use the Download to Printer option successfully on a Macintosh OS X system, it is recommended that you set your system's default printer to the Last Printer Used setting. For example, open your Printers & Scanners System Preferences and select Last Printer Used from the Default printer popup menu, as shown circled in the picture below:
Using Destination with Page Sets per Job to Streamline Jobs
Choosing the Copy to Specified Folder or the Download to Printer option in conjunction with the Page Sets per Job: Specify or Page Sets per Job: Subset option can help to streamline a merge session by allowing you to "chunk" the variable data job into more manageable sections. For example, if you select Specify for Page Sets per Job and enter the number "100" as the maximum number of page sets per job, then the session will merge the first 100 page sets and will incorporate all of the required elements for those pages into a single job. The merge session will then send that job to the Hot Folder or printer to start the printing process. Once the job has been sent, the merge session will repeat these steps for the next job in the session. As subsequent jobs are created, each one is immediately sent in turn to the selected Hot Folder or printer.
Run the PDF Session
Follow the steps outlined below to continue with the PDF session.
- Click the Continue button when you have finished selecting options.
- Update the Preflight data for the document, if prompted.
If you have not yet run a Preflight Report on this document for the currently selected data file, you will be prompted to update the Preflight data for the document. Although it is not a requirement, preflighting your job is very important if you wish to achieve the best possible performance. Click Yes to execute a Preflight Report. When finished, the Preflight Report window will list all external files that this document will require to merge the selected data file. An example is shown below:
Examine the report. If the report lists an OK status for all of the files, then click Continue. If the status for any of the files is not OK, then click Cancel to cancel the PDF Driver session so that you can address these issues before continuing. For more details about running a Preflight Report, see Tutorial #1, which is available in DesignMerge Documentation. - Select appropriate Export Adobe PDF settings for the output.
If you have elected to produce output in a PDF/VT format, then select PDF/X-4:2010 (or above) for the Standard setting on the Export Adobe PDF window because earlier standards do not support producing a file in a PDF/VT format. Additionally, if the document contains a transparency effect, select Acrobat 5 or above for the Compatibility setting for optimal performance. - When ready, click Export and then select the Destination Folder for the PDF output.
You will be prompted to select a folder where the PDF output will be saved in a PDF file format or in a PDF ZIP file format, according to the Create Zip File Container option you selected on the PDF Driver window. Information is provided for each option below:
Save each PDF job in a PDF file format (do not create Zip File Container)
Select the location where you wish to place the PDF file(s). Each PDF file (job) that the session produces will be saved in this location. Note the Print Driver will additionally apply the Post-Processing Destination option you selected for this output.
Save each PDF job in a PDF Zip file format (create Zip File Container)
Select the location where you wish to store the PDF ZIP file(s). Each PDF ZIP file (job) that the session produces will be saved in this location. Note the Print Driver will additionally apply the Post-Processing Destination option you selected for this output.
For best performance, select a location on the workstation where DesignMerge is running. Note: If you have selected Download to Printer or Copy to Specified Folder for the Print Driver to send the output files to a printer or Hot Folder, you will still be prompted to select a Destination Folder. You may wish to create a temporary holding folder for your output that you can clear from time to time.
Track the Progress of the Session
The merge session displays progress windows as the output is being produced. You may click Cancel at any time to cancel the session. When the session is completed, the Print Driver presents a summary report, which is described next.
Review the Summary Report
A summary report details the jobs that were created and any page sets that were omitted due to errors. You may copy the report to the clipboard, or save it as an external file. A sample summary report is provided in the picture below:
Print the PDF Output
The Destination Folder should now contain all of the output from the merge session. Additionally, each job will have been placed in a Hot Folder or sent to the printer if you specified one of these for the Post-Processing Destination. For information about printing a PDF or PDF/VT job on your printer, consult the documentation for your printing system.
PDF DRIVER PREFERENCES
There are a number of DesignMerge preferences available that apply to this Print Driver. To access these preferences, select Preferences from the DesignMerge menu. This opens the Preferences window for DesignMerge. Click the Output button to modify the Output preferences, which allow you to control various aspects of a Print Driver merge session, including file naming. For a detailed description of each preference, including those that apply to this Print Driver, see the DesignMerge Preferences manual, which is available in DesignMerge Documentation.
ENABLING CONTROL FRAME PROCESSING (a Pro feature)
A Pro edition of DesignMerge provides the ability to apply additional processing instructions to a Print Driver merge session. You may wish to control, for example, the file names that the Print Driver will apply to the output for a job, which is the next topic in this manual. This additional processing is accomplished by adding a Control Frame to the document and by enabling the Control Frame Processing capabilities of DesignMerge. If the Control Frame Processing capabilities are not enabled, then a Print Driver will ignore any and all control frames that have been placed in a document.
To confirm Control Frame Processing is enabled on your system, select Preferences from the DesignMerge menu to open the Preferences window. Then, click the Output button on the Preferences window. This will open the Output window where you will see the Enable Control Frame Processing option, shown below:
USING THE "FILENAME FRAME" FEATURE (a Pro feature)
When using a Pro edition of DesignMerge, you have the option of adding a unique type of text frame called a Filename Frame to your document. A Filename Frame is designed to provide customized names for merged Print output. This allows you to have complete control over the naming of the jobs that a Print merge session creates. When you use the Filename Frame feature, all other Print Driver Job Name settings (including Base Job Name and record range) are ignored. Rather, the name of each job will be taken from the text that is inside the job's merged Filename Frame.
The Filename Frame can contain any text, including Variable Links. In fact, by placing a Variable Link inside the Filename Frame, you can automate the naming of your jobs by linking to a data field which contains unique names. Typically, the Filename Frame is most helpful when producing an individual job for each new page set (by setting the Print Driver's Page Sets per Job option to Single PDF Files or to Specify with the number "1"). However, the Filename Frame can be used for any number of Page Sets per Job.
Note that the content of the Filename Frame itself will not appear on any printed pages because DesignMerge automatically sets it up to be nonprinting (DesignMerge turns on the frame's "Nonprinting" attribute).
To use the Filename Frame feature, follow the steps outlined below:
- Open a document.
Open a document that has been prepared by DesignMerge for variable data. For this example, open the sample Form Letter document (Form Letter.indd) that is in the 1) Form Letter Tutorial folder in DesignMerge Documentation. Confirm the document has the DesignMerge variables that you added when you followed the steps in Tutorial #1, which is available in DesignMerge Documentation. - Create a text frame in the document and select it with the Selection tool.
You can place the text frame anywhere on the page (but not on the Pasteboard area). The frame will not print because, when you assign this frame to be the Filename Frame, DesignMerge will automatically set the frame to be nonprinting. Next, use the Selection tool to select the new text frame. Below is an example using the Form Letter tutorial document: - From the DesignMerge menu, select Utilities > Print Driver > Control Frame > Create.
This will open the Create Control Frame window, as shown below: - Select Filename from the Type menu, and click OK.
The text frame gains a dashed Magenta border with a shaded Magenta background and a non-printing label, indicating it is a Filename Frame. Also, if you look at the InDesign Attributes window for this frame, you will see that DesignMerge has turned on the Nonprinting option, meaning that the frame (and its content) will not appear on any printed pages. An example of a Filename Frame is shown in the picture below:
If you accidentally assign a Filename Frame to the wrong text frame, simply select that text frame, and then select Utilities > Print Driver > Control Frame > Remove from the DesignMerge menu. This will remove the Filename Frame assignment and will also restore the text frame's original stroke, background, and printing attributes.
- In the Filename Frame, insert at least one Variable Text Link along with any desired fixed text, and the appropriate file name extension (".pdf").
As discussed earlier, the content in the Filename Frame will determine the name for each job the Print Driver merge session will produce. So, if you were to type a filename into this frame manually, that filename would be used as the name for all jobs that the merge session creates. Note that since this filename would be invariable, if multiple jobs were produced by a merge session, they would overwrite each other because the exact same filename would be used over and over again. Obviously this is not a desirable result.
To vary the filename of each job that a merge session creates for a document, you must first include in your data file a field which contains a unique filename for each job that you wish to create. Then, to make the content in the Filename Frame variable, just place a Variable Text Link for that data inside the frame as you normally would.
For an example, we will be using the "Name" Link for the "Name" field in the sample Form Letter data file. This will produce jobs that use the Name data ("Roland Reed", "Cindy Olsen", "Thomas Corbo", etc.) for their filenames. Each record in our sample data file contains a unique name, which is why we can use it for this example. The picture below shows an example of a Filename Frame where the "Name" Variable Link has been inserted as a Text Link:
Now, because the text that appears inside the Filename Frame is going to be used as the file name for a PDF file, add ".pdf" for the file name extension. For example, simply enter the characters ".pdf" to the right and outside the "Name" Text Link that we just inserted, and remove any extraneous word spaces, as shown below:
Note that it is important to add the ".pdf" characters outside the “Name” Text Link. Otherwise, the ".pdf" characters will be replaced by the incoming variable text during the merge process. If the ".pdf" characters are inside the Text Link, you can easily move them to the outside by highlighting the ".pdf" characters and then click the Remove button on the DesignMerge panel (or select Utilities > Link > Clear Selection Range from the DesignMerge menu). - Merge the document.
Merge the document as described earlier in this manual except set the Page Sets per Job option as described below to use the Filename Frame feature successfully:
Set the Page Sets per Job value.
When using the Filename Frame feature, you will typically want to set the Page Sets per Job option to Single PDF Files or to Specify with the number "1". That way, the merge session will create an individual job for each merged variation of the document. For example, using the Form Letter tutorial where the document has one page, select Single PDF Files if available or else select Specify and enter "1", so that the Print Driver will create five jobs, one for each of the five records in the Form Letter data file. - Review the summary report.
When the merge session has finished, you will be presented with the summary report window listing the jobs created by the merge session. Notice that each job's name reflects the contents of its merged Filename Frame. For example, five jobs were created from this set of steps, each one basing its name on the "Name" data in the sample data file, as shown below:
As long as the Control Frame Processing feature is enabled (see the "Enabling Control Frame Processing" topic earlier in this manual) and the merge session is able to locate a Filename Frame in the document, then the session will use the contents of the Filename Frame for the names of the jobs it produces. If Control Frame Processing is not enabled, or if the session cannot find a Filename Frame in the document, then the session will name the jobs as it normally does by automatically appending a record range and file name extension to the Base Job Name.
If you create a job containing more than one merged page set (i.e., you set the Page Sets Per Job to any number greater than the number "1"), the job will carry the name provided by the first Filename Frame in that job. Additionally, if your document contains more than one sequence of Links, the output will be given the name provided by the record(s) that were merged according to the Sequence Number you assigned to the Links in the job's first Filename Frame.
The file names of PDF Driver output may contain a maximum number of 128 characters, including the file name extension (.pdf). Before you run a PDF Driver merge session that will use a Filename Frame, run a Longest Line Test merge session to confirm the longest file name the merge session will produce will be less than 129 characters.
MORE INFORMATION
For more information about DesignMerge and its modules, please see the information provided in DesignMerge Documentation, as described below:
Tutorials present various features of DesignMerge in an easy-to-follow, step-by-step format to help you quickly learn more about using DesignMerge.
Manuals for the modules in the DesignMerge software package present more detailed information about the features that a particular module provides.
Remember: Help is available! If you have any difficulty at all, we are here to help. Please feel free to open a support ticket by going to the Meadows Online Support Center: